Whirlybird Installation
Providing whirlybird installations in Perth, our trained professionals install using industry standard techniques.
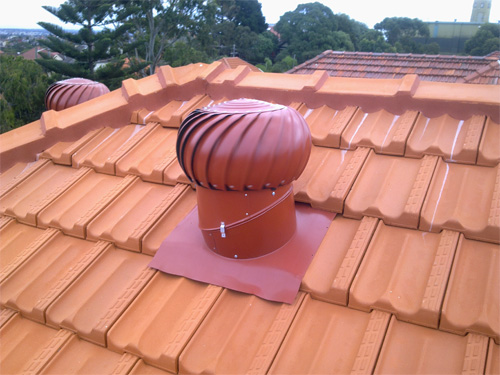
The first stage in a whirlybird installation is finding a location on your roof space. Following common standards we usually place the whirlybirds away from the street side, and place them 3 rows down from the roof ridge.
The second stage in a whirlybird installation is removing roof tiles and installing the flash panel of the whirlybird. Carefully removing 2-3 tiles we create an opening big enough to fit in the flash panel of the whirlybird. Installing the flash panel we slide the tiles over to make the installation seamless.
The third stage of whirlybird installation consists of the securing of the flash panel and collar to the roof by using the tree metal strap and the screws provided with the whirlybird. When screwing down the whirlybird we ensure the fixture is firm and secure to prevent any movement.
The final stage of the whirlybird installation is the installation of the rotor head. Agin ensuring the fixture is form and secure we use the provided self-tapping screws and gently attach the rotor head.
Our Whirlybird installation service comes with a 20 year guarantee, so don’t wait and get your roof ventilated today!
We provide Whirlybird installation to the following areas of Perth:
Armadale, Bayswater, Belmont, Bassendean, , Cambridge, Canning, Cockburn, Fremantle, Joondalup, Craigie, Kalamunda, Kwinana, Melville, Nedlands, Perth CBD, Rockingham, Serpentine, South Perth, Stirling, Subiaco, Swan, Victoria Park, Wanneroo